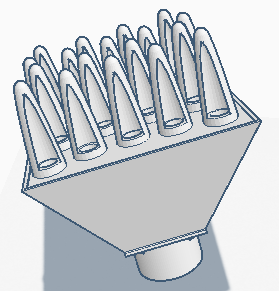
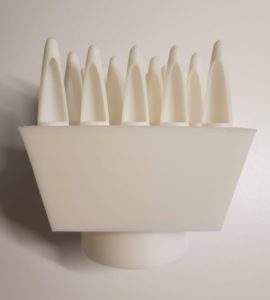
For those of you who have access to a 3d printer and are looking at more effectively killing lice and nits from a lice infested person, I’ve spent some time designing a lice hair dryer diffuser attachment.
Check out the files at https://www.thingiverse.com/thing:3845740
You will need to print the attachment out of ABS filament as temperature output from consumer level hair dryers can reach as high as 197 °F!

Why do you need a hair dryer nozzle attachment?
The goal of the hair dryer attachment (although completely optional for the methods described on this website) are to:
- Minimize scalp discomfort of the person being treated by directing the flow of hot air parallel to the scalp instead of directly onto it
- Maximize hot air to nit contact
- Increase the percentage of louse eggs being killed during a hot air treatment
- Increase efficiency of the Method 1 hot air de-lousing treatment (as described on this web site)

3d printed hair dryer diffuser for lice
Nozzle design and use
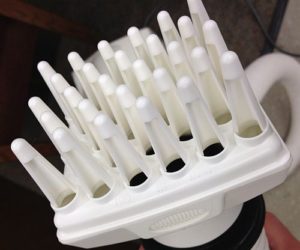
The nozzle design is based off the commercial de-lousing machine LouseBuster Pro nozzle (as shown below) and as such, directions for applying it to the head are near identical to using the original version.

The original LouseBuster nozzle attachment
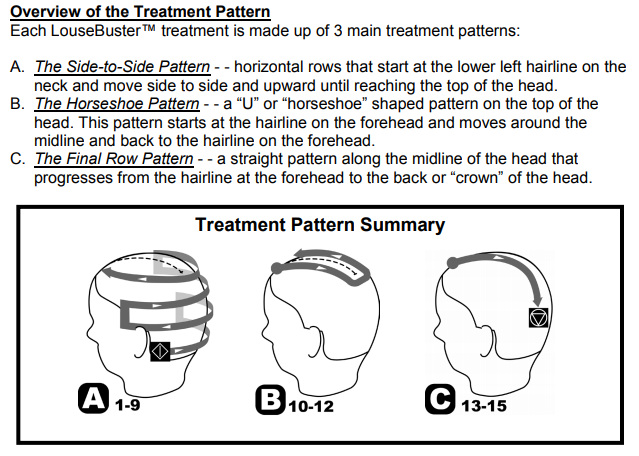
One can find the operators manual with instructions here, but I included the pattern for which one should apply the nozzle to the head below (with one progressing through the patterns alphabetically during the de-lousing treatment).

differences in application
Because a consumer hair dryer fan will not be able to produce the volume of airflow that the LouseBuster Commercial blower can, the time spent per section of hair will need to be increased.
The 30 second intervals spent at each section as noted in the LouseBuster operators manual will instead need to be adjusted for a consumer hair dryer, to 1-5 minutes per section.
Use with Method 1 of our head lice treatment.